Hanukkah
Make a Paper Hanukkah Menorah
 Facebook
 Pinterest
 X
X LinkedIn
 Reddit
 WhatsApp
 Telegram
 Bluesky
 Email
Email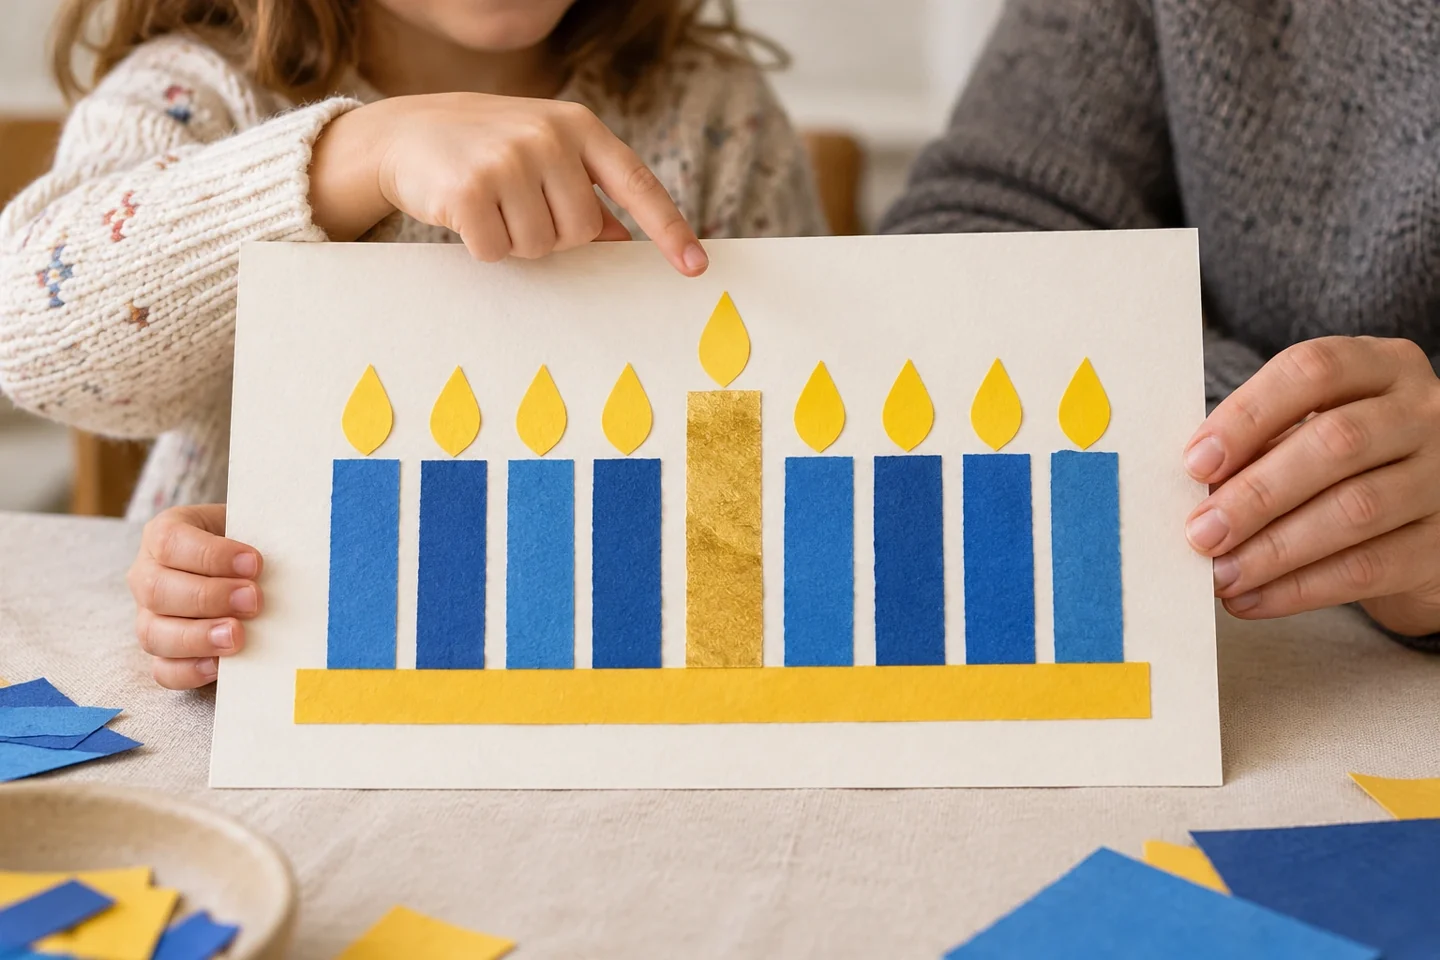
Your activity at a glance
| Suggested ages | 4–9 |
|---|---|
| Activity time | 30–40 minutes |
What you need
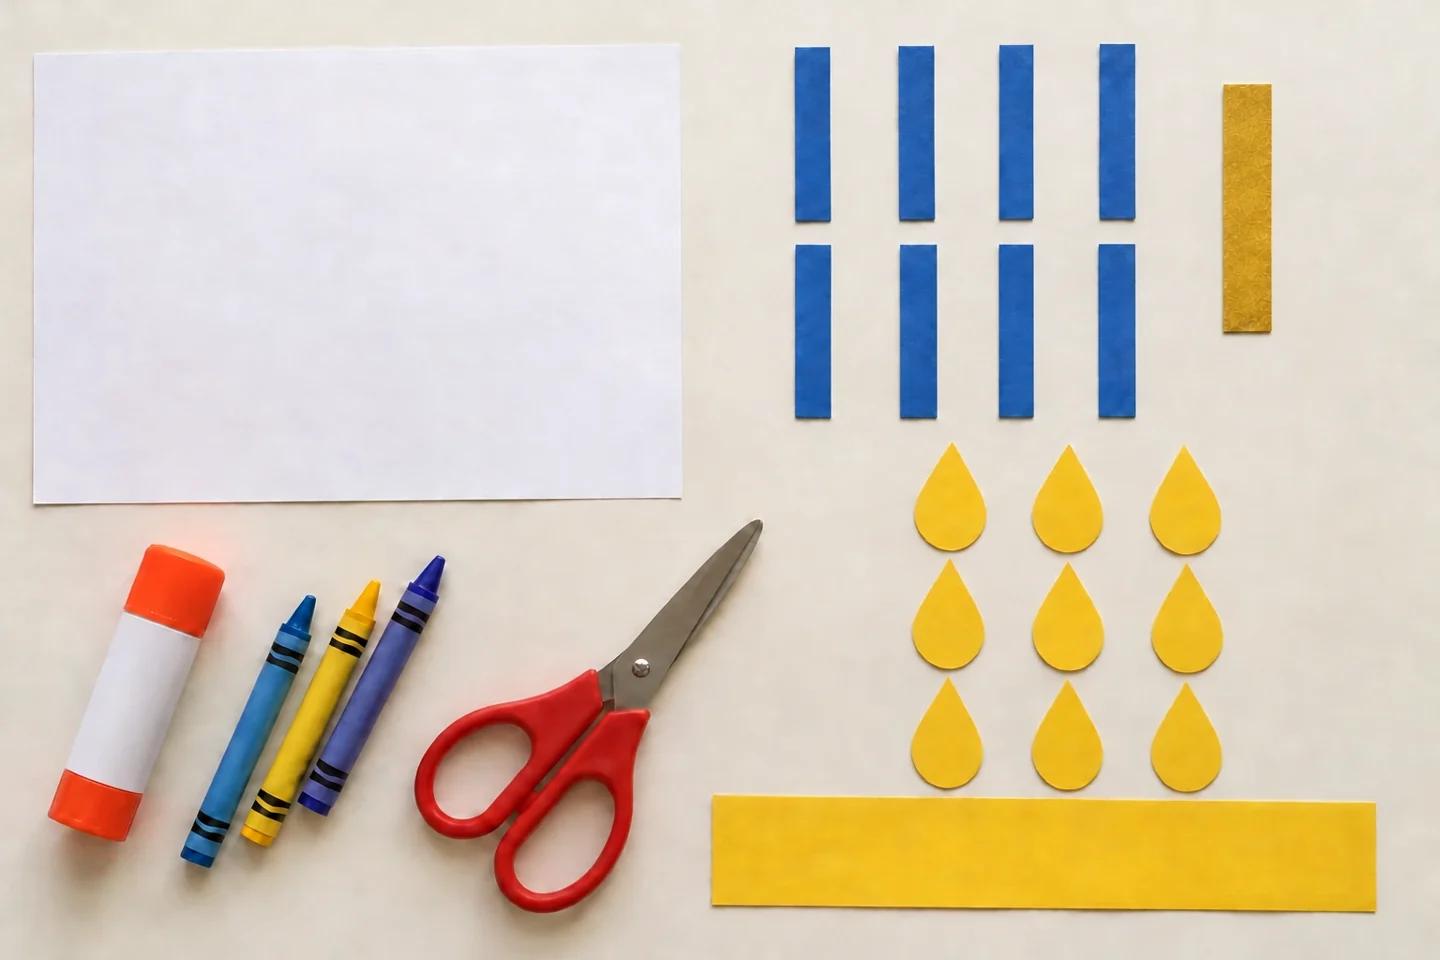
- 1 sheet of background cardstock approximately 8½ × 11 inches
- 8 equal paper candle rectangles approximately ½ × 3 inches
- 1 taller paper candle rectangle approximately ½ × 4 inches
- 9 yellow or orange paper flame shapes
- Paper base strip, glue stick, crayons, and scissors
Build eight lights and one helper
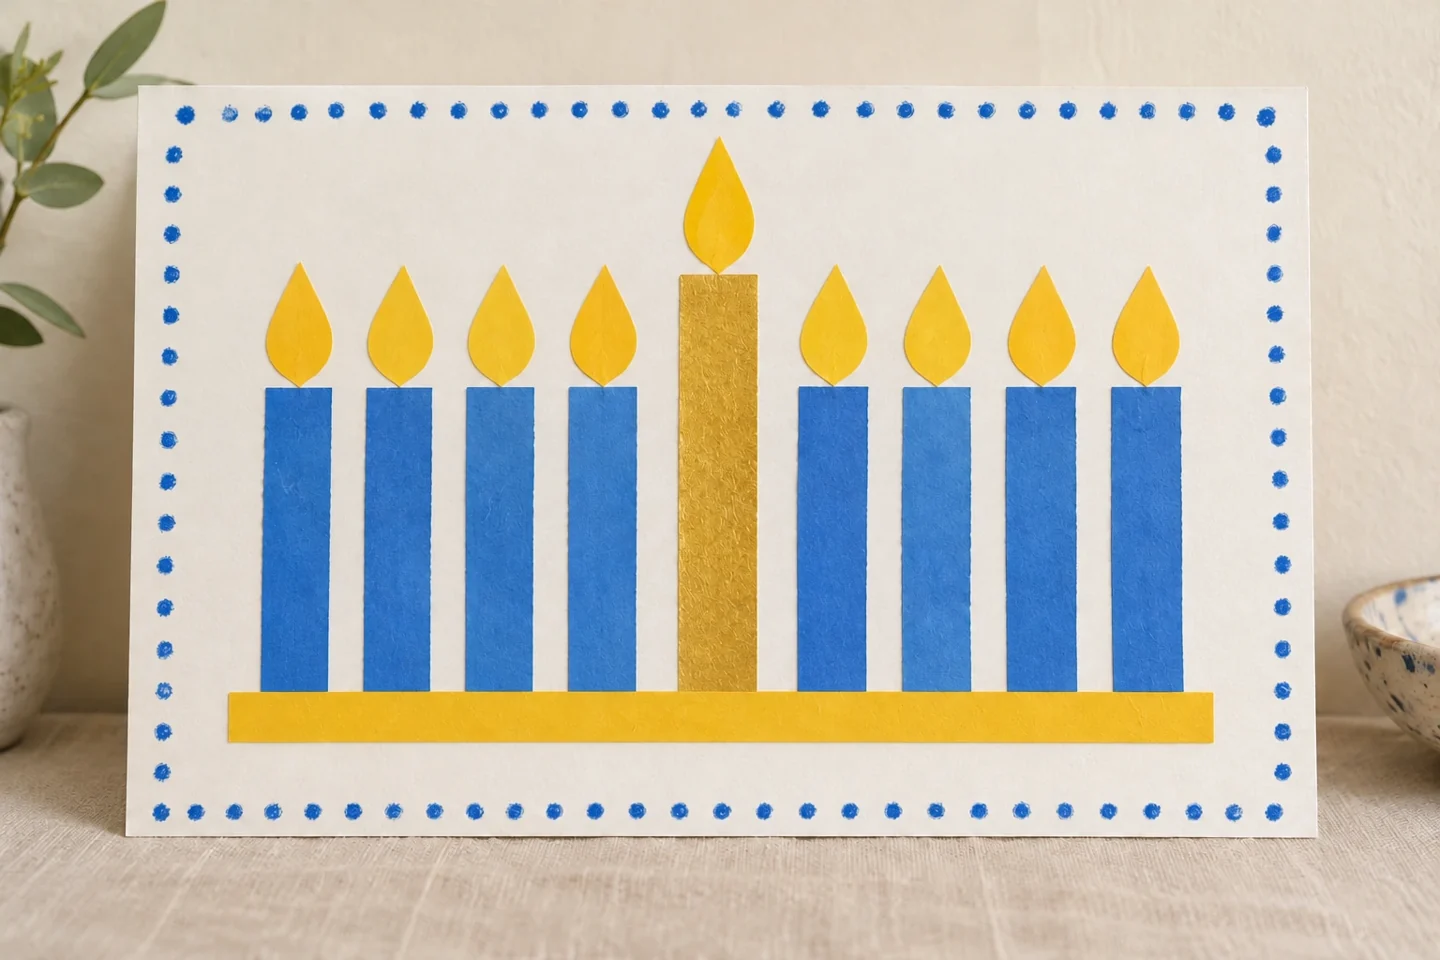
A paper Hanukkah menorah gives children a hands-on way to notice the holiday’s eight lights and its separate helper light, the shamash. The nine pieces are not interchangeable: eight represent the eight nights, while the ninth has a distinct position. Our craft uses eight equal candles and a taller shamash to make that difference easy to see. It is a flat paper decoration, with paper flames instead of real candles.
Before you begin
Turn the background sideways so all nine pieces have breathing room. Cut one candle first and use it to measure eight matching rectangles, then make the taller shamash. Keep flame shapes in a separate bowl. Children can arrange and count every piece before the glue comes out.
Let’s make it, step by step
1. Introduce the nine lights
Explain that the Hanukkah menorah, also called a hanukkiah, has places for eight holiday lights and a separate shamash. The shamash is used to light the others in candle-lighting practice. This paper activity represents the shape; it does not replace a real ritual lamp.
2. Prepare eight matching candles
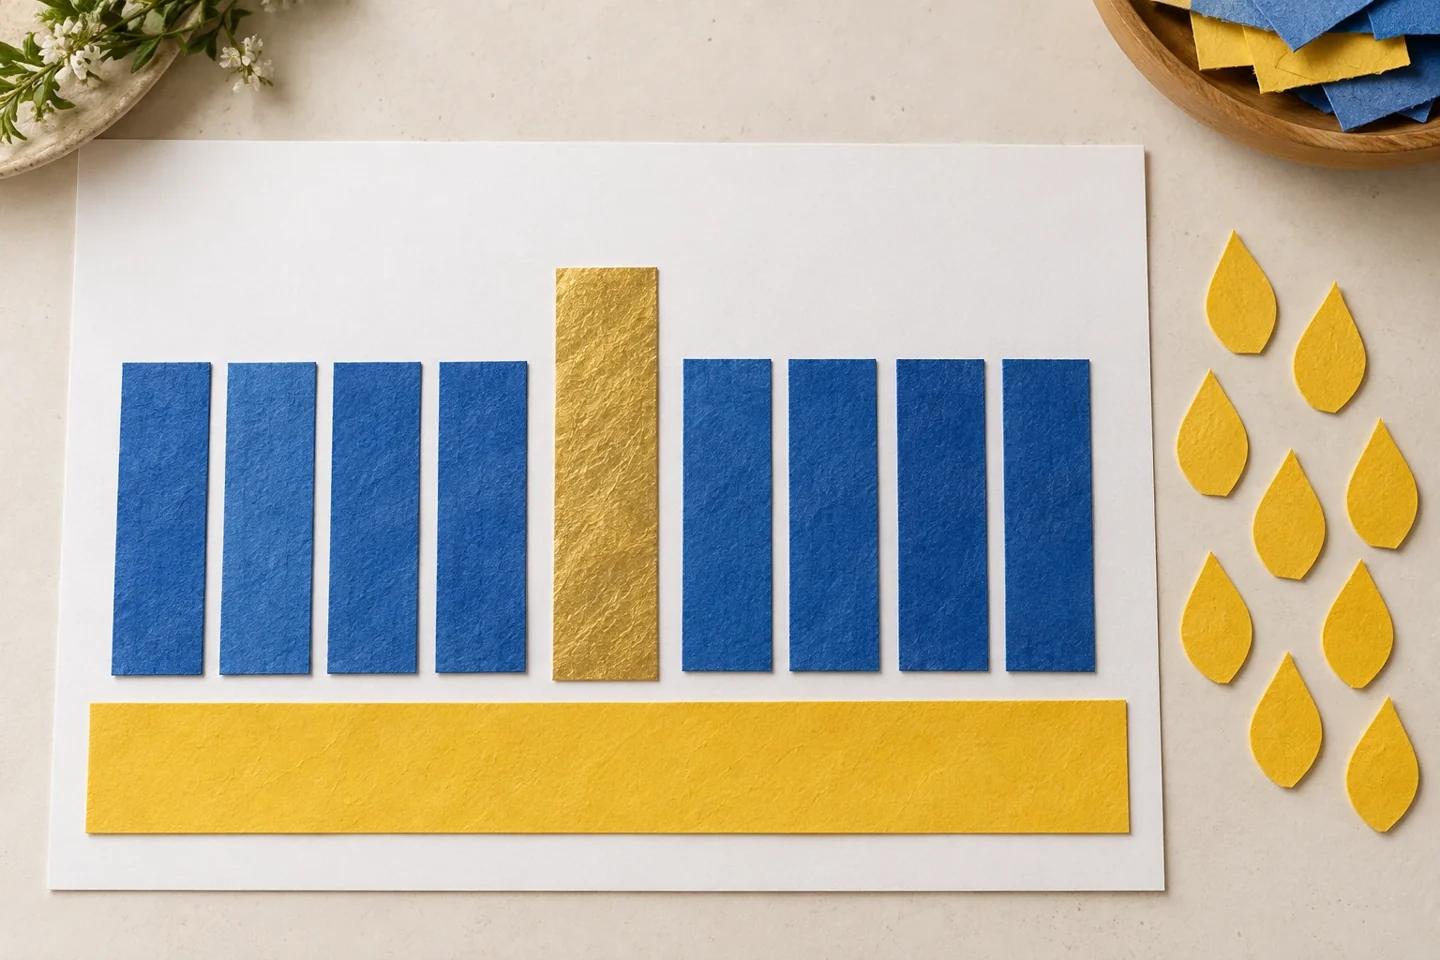
Cut eight equal rectangles approximately ½ inch wide and 3 inches high. Count them together, arranging four on each side of a small gap. Let children choose their paper colors. Keep their heights equal so the helper candle can be clearly distinguished.
3. Make the shamash distinct
Cut one rectangle approximately 4 inches high. Place it in the center gap with its top higher than the other eight. Point out which piece is separate and why. Some real hanukkiot place the shamash elsewhere; height and position can vary.
4. Plan the base
Lay a wide paper strip beneath the nine candles as a simple decorative base. Arrange the whole design on the background before gluing. Leave enough room above each candle for a paper flame and a small gap around the outer edges.
5. Glue the candle shapes
Attach the base first, then the eight equal candle rectangles and the taller shamash. Use light glue strokes and press each piece flat. Count only the eight holiday candles once, then identify the shamash separately rather than calling the display nine nights.

6. Add paper flames
Cut nine teardrop-shaped flames and glue one above each candle. Use the tip of a crayon to add an inner orange mark if desired. These are drawings of flames, not instructions for lighting paper. Keep the finished decoration away from real candles.
7. Add a personal border
Draw a simple patterned border around the background or add a few paper shapes. Keep the nine-light structure clear. If the child wants words, an adult can help write a greeting accurately; there is no need to add lettering to complete the craft.
8. Describe and display
Invite the child to point to the eight lights and the shamash. Display the paper artwork on a wall or shelf where it will not be near heat. At another sitting, revisit the picture and count how many holiday lights correspond to a particular night.
Talk, notice, and learn together
Ask, “Which candle has a different job?” and “How do four on this side and four on that side make eight?” Children can compare height and position while learning a specific holiday detail. Avoid generalizing this nine-light craft to the seven-branched menorah, which has a different history and form.
Make it work at home or in a classroom
Younger children can place adult-cut candle shapes on lightly marked positions. Older children can draw their own layout with eight equal lights and a distinct shamash. In a classroom, introduce the craft as a Hanukkah activity and explain its meaning before offering artistic choices.
Helpful fixes and cleanup
If the layout becomes crowded, widen the base or use a landscape background. If the shamash looks indistinguishable, raise its top or move it to a visibly separate position. Store the artwork flat. Save spare paper flames in an envelope for counting games that use the same accurate eight-plus-one distinction.
A useful way to extend the activity
Make eight small number cards and take turns choosing one. Point to that many holiday candles in the picture while naming the shamash separately. An older child can show two groups that make eight, such as three and five. Keep the finished paper decoration intact and use the cards for counting; families can explain their own candle-lighting traditions alongside the craft.