Fall & Halloween
Paper-Strip Pumpkin
 Facebook
 Pinterest
 X
X LinkedIn
 Reddit
 WhatsApp
 Telegram
 Bluesky
 Email
Email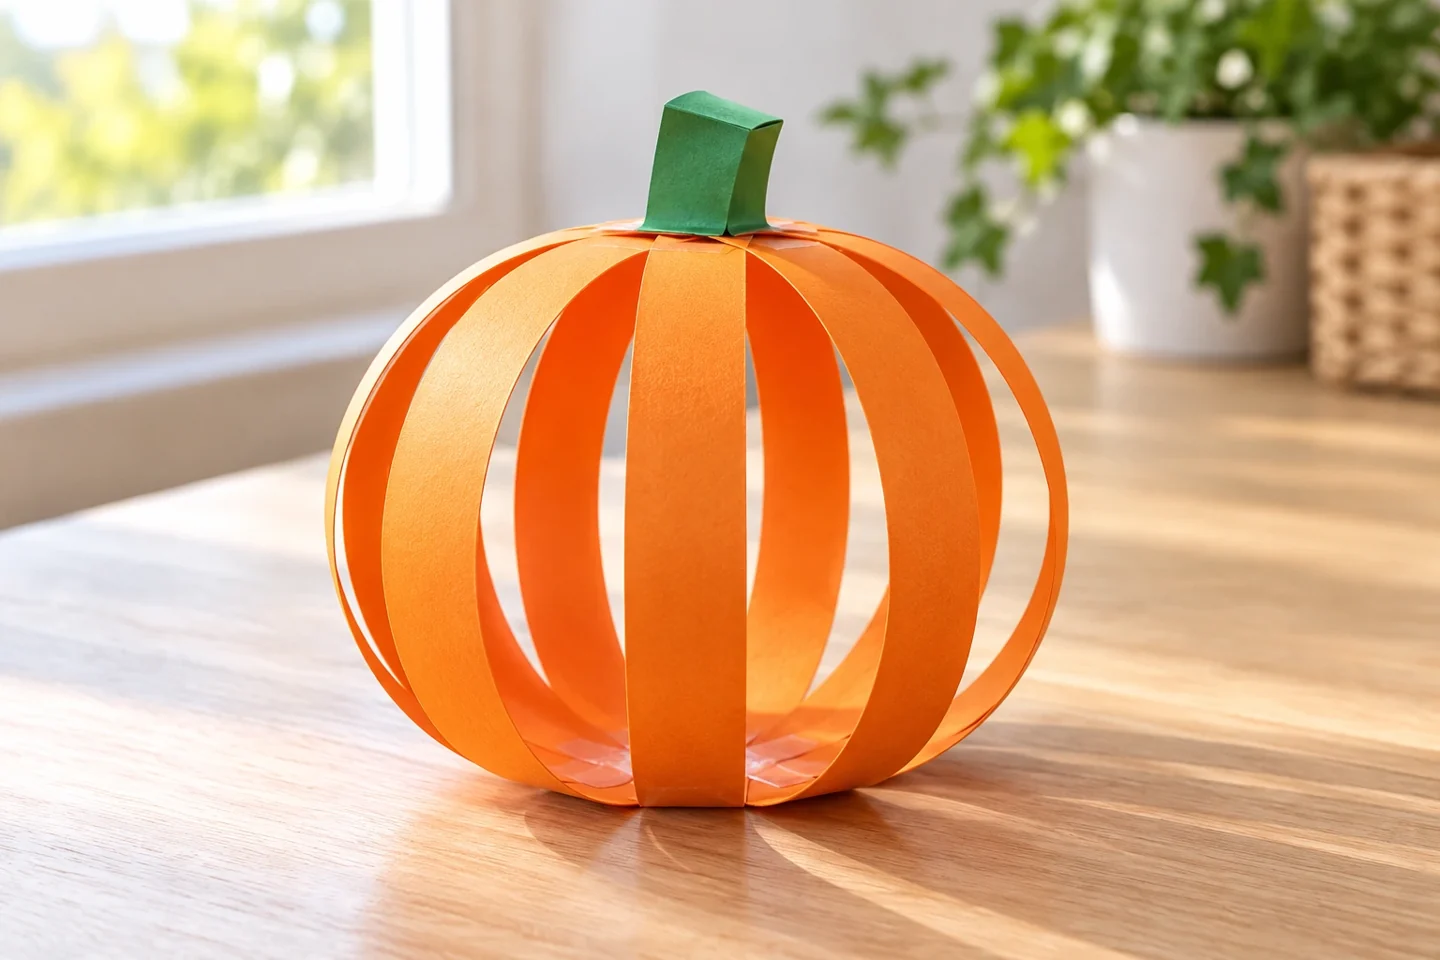
Your activity at a glance
| Suggested ages | 6–10 |
|---|---|
| Activity time | 30 minutes |
What you need
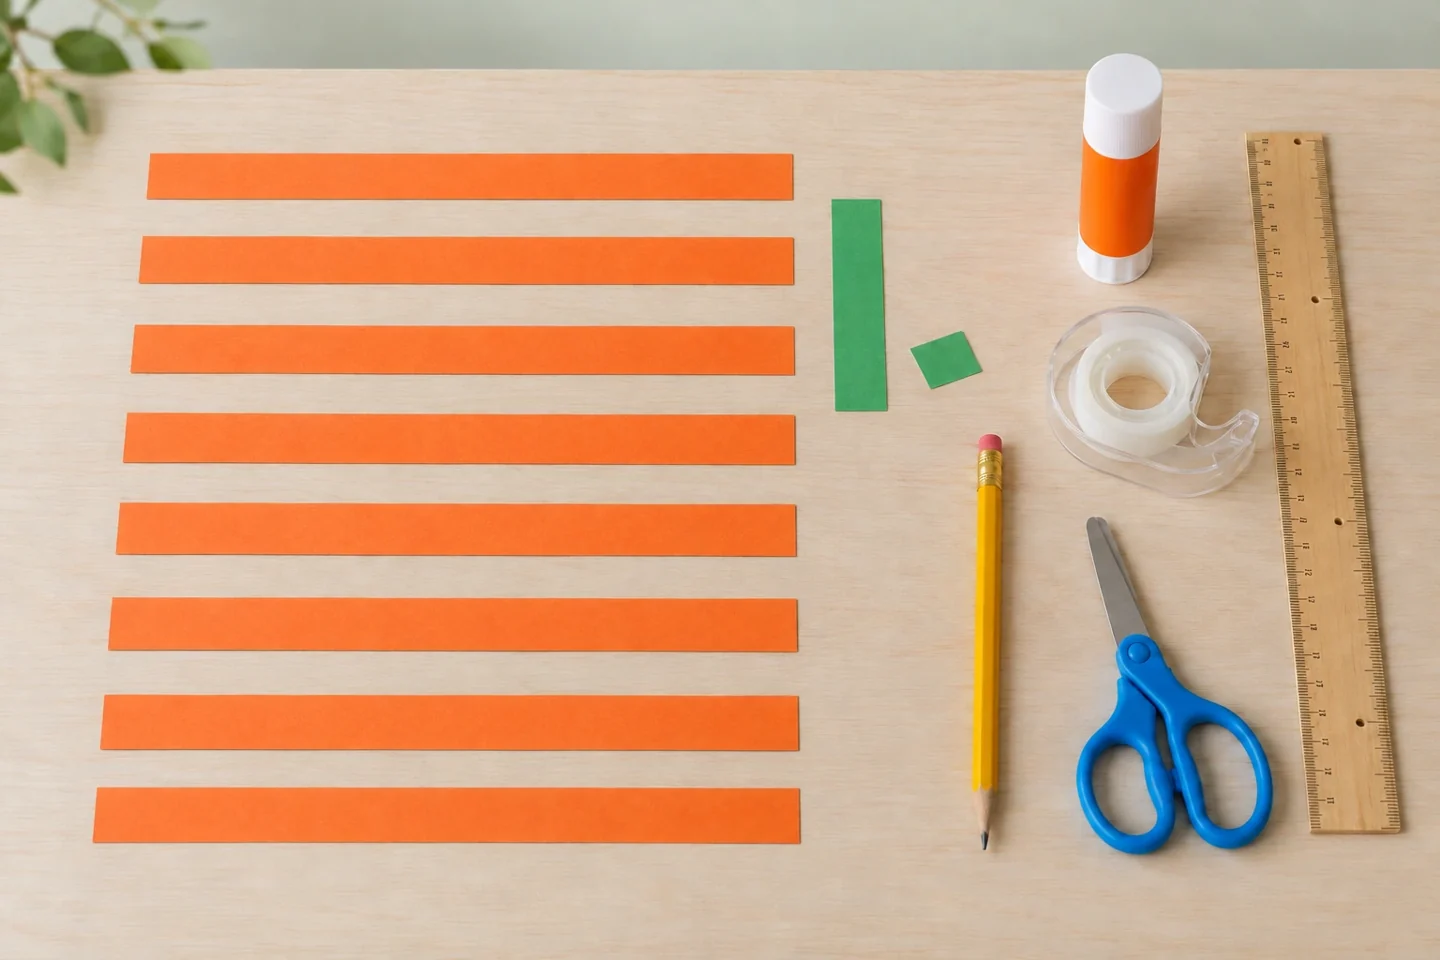
- Eight orange paper strips, each 2 × 20 cm
- one green strip, 2 × 8 cm
- one glue stick
- clear tape
- ruler
- pencil
- child-sized scissors
- Optional small green paper scrap for a leaf
A little project with plenty to discover
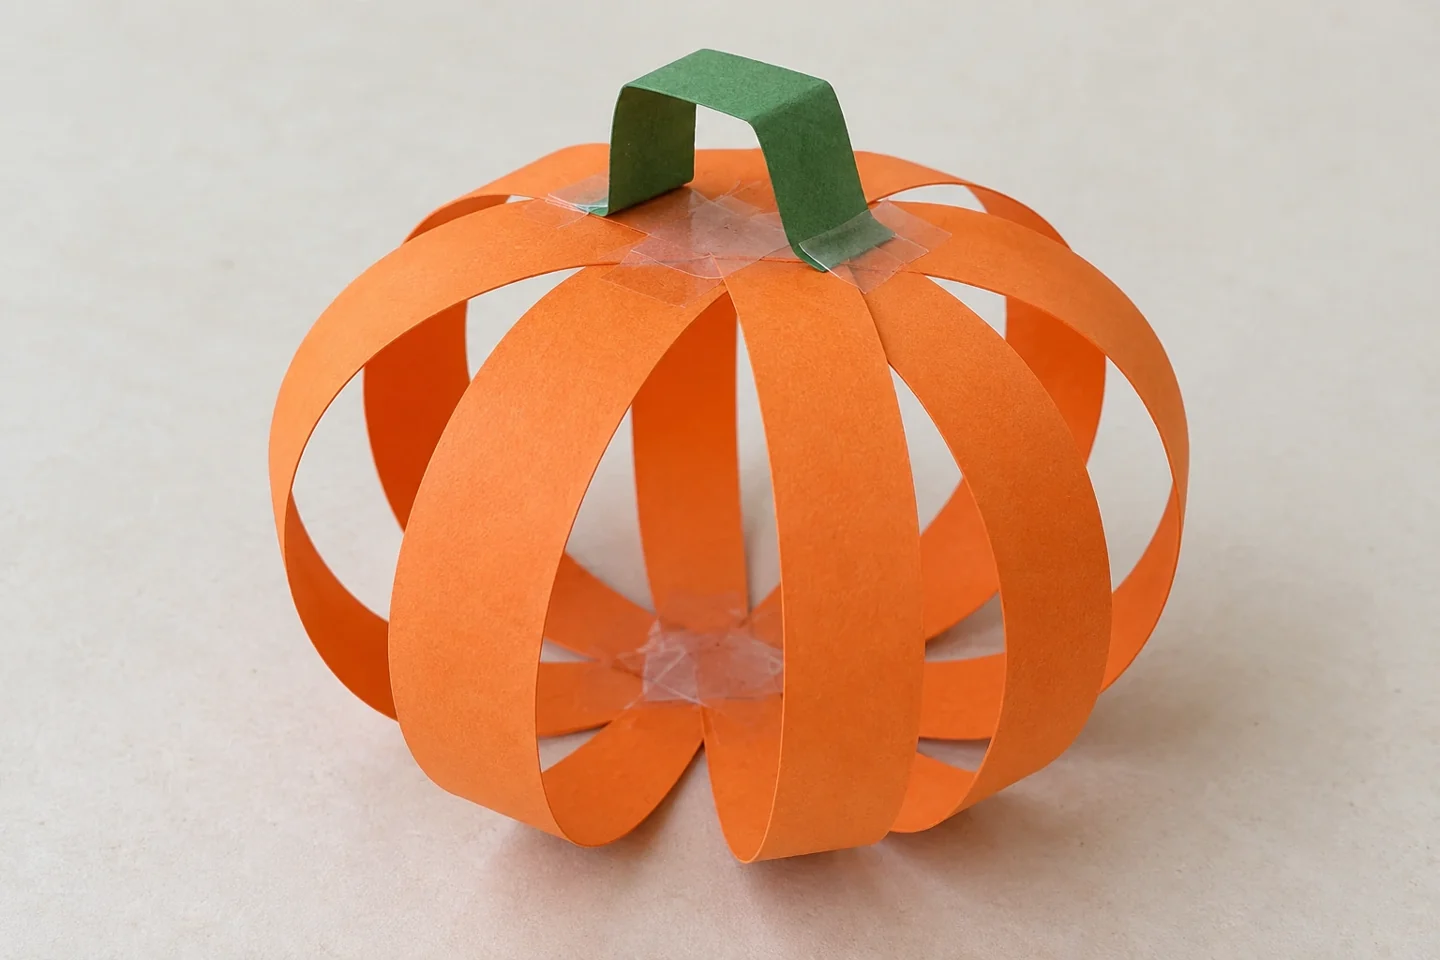
Build a pumpkin that has real volume: eight curved paper ribs surround an empty middle. Turning flat strips into a rounded form gives children a satisfying introduction to paper sculpture.
Use ordinary construction paper rather than very thin tissue paper, which will not hold a rounded curve. Mark the eight strips with a ruler before cutting; their matching lengths matter more than perfectly straight edges. Cut several short tape pieces in advance and park them along the table edge. A child can then hold a join with one hand while reaching for tape with the other. Keep the green stem aside until the pumpkin body stands, because an early stem makes the top join harder to see.
Get the setup right
Build the bottom join on the tabletop, where it is easy to keep all eight ends together. The first two curved ribs form a useful framework; rotate the pumpkin and add the next pair across them. Avoid pulling the upper ends so tightly that the pumpkin becomes narrow. If two strips overlap along their entire length, separate their lower ends around the bottom join before taping their tops. The empty spaces between ribs are intentional: this is an open paper sculpture, not a solid ball.
For the upper join, begin with two opposite spokes. Bring their ends together about 6–7 cm above the taped bottom, keeping both ribs curved outward, and tape the overlapping tips. Join the next opposite pair across the first pair, then add the remaining pairs. An adult or partner can hold the growing bundle while the maker tapes. Fold the 8 cm green strip into a small upside-down U and tape its two ends over neighboring top ribs to make the stem. The bottom join rests on the table; the curves should open around it rather than being flattened.
Make it step by step
- Cut eight equal strips. Stack them and compare their ends so the ribs begin at the same length.
- Arrange the strips like spokes with all lower ends overlapping at one center. Tape the overlapping center securely.
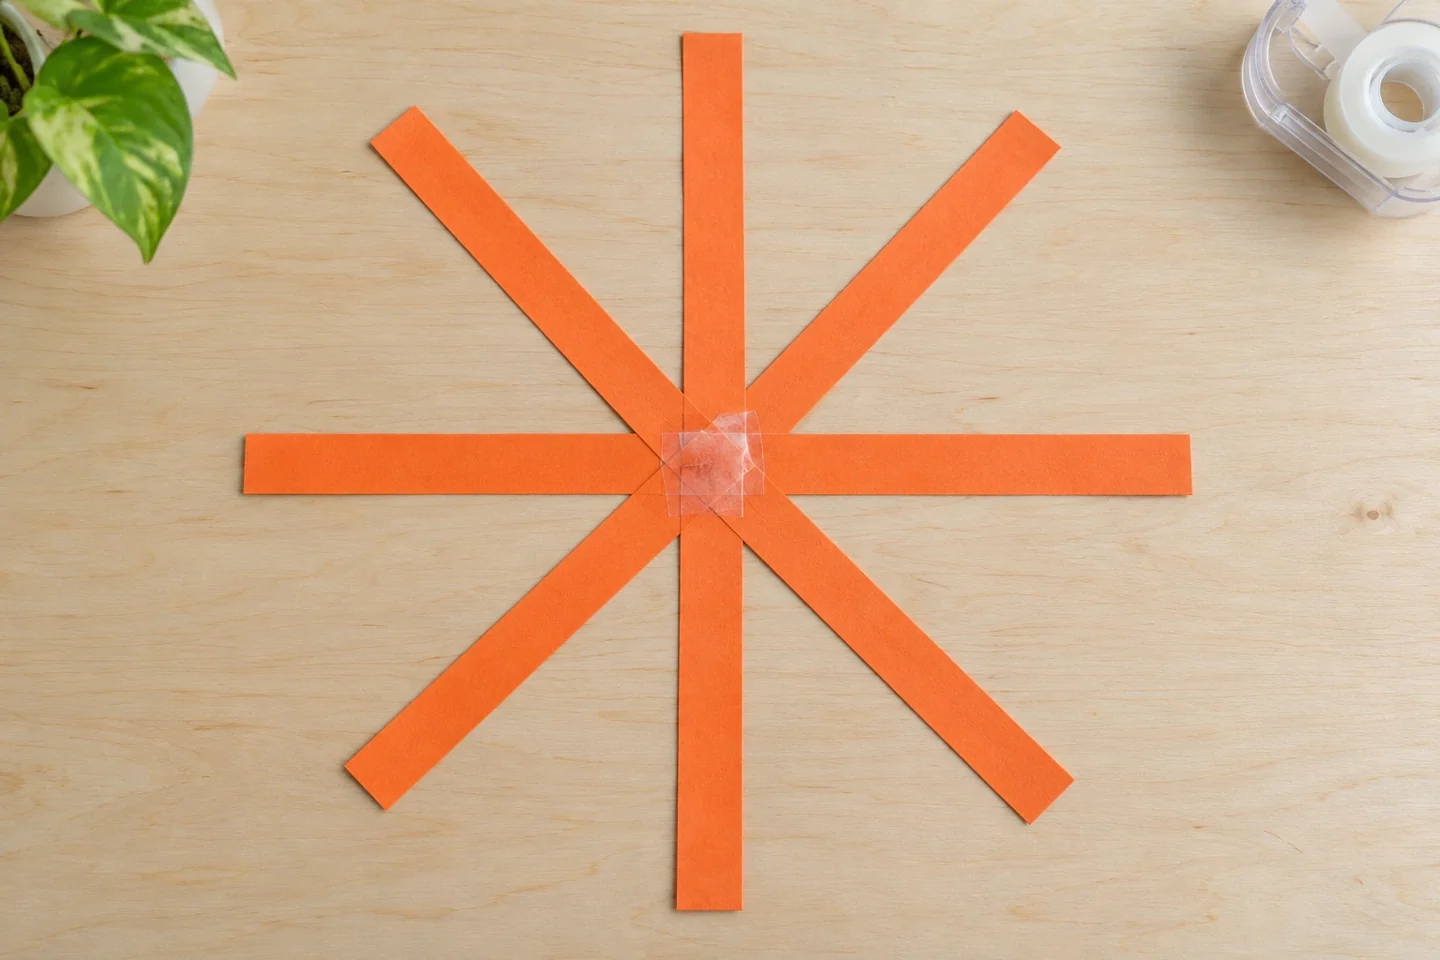
Tape the overlapping lower ends while every free end is still flat. - Bring the free ends up one at a time to meet above the center. Tape each end to the growing top bundle while keeping a gentle outward curve.
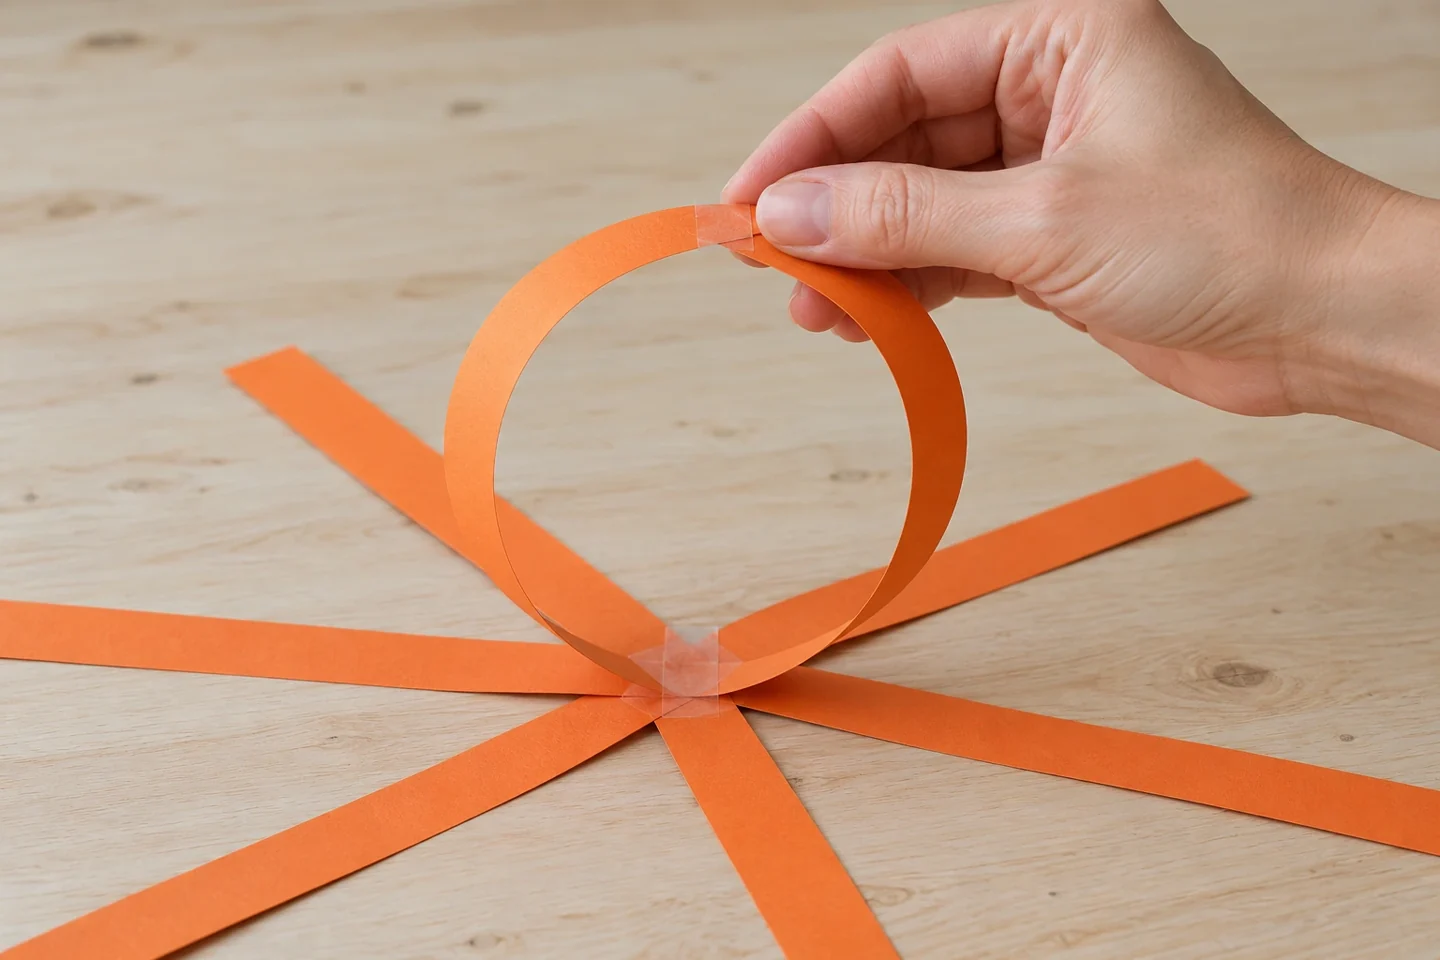
Start the top join with two opposite ribs; keep their curves relaxed while you tape the tips. - Spread the ribs evenly around the pumpkin. Add a folded green stem over the top tape, pressing its ends onto two nearby ribs.
- Stand the pumpkin on its taped bottom and gently adjust the curves. Draw or attach a paper leaf if you would like another detail.
Make it work at home or in your classroom
For a first attempt, an adult can cut and arrange the strips while the child selects the colors, presses tape, and spreads the ribs. Work side by side for the upper join: one person holds two curved strips and the other secures them. Older makers can plan a striped pumpkin using alternating orange and yellow ribs. In a classroom, give each pair eight strips and one tape supply rather than sharing a large pile, which makes it harder to notice whether a strip is missing.
Talk, notice, and learn together
How does a flat strip change when its two ends meet? What happens if we make every strip longer?
Make a second pumpkin using eight strips that are all 5 cm shorter. Keep their widths and number the same so there is just one deliberate change to compare. Place the two pumpkins together and describe their height, width, and the spaces between ribs. Children can sketch both versions or measure across the widest part with a ruler held nearby. Ask them to predict what wider strips might change before making a third version; thicker coverage and the overall rounded form are separate things to notice.
Helpful fixes
The pumpkin tips: widen its bottom curves before adding more tape. A rib buckles: relax the bend instead of squeezing it flat.
Try a striped pumpkin
For a striped version, prepare four orange and four yellow strips. Arrange them alternately around the bottom join before curving them upward, then check the same order at the top. Changing the order halfway makes some strips cross, which may be interesting but is harder to secure. Ask the child whether they want a regular stripe pattern or a mixed arrangement. A tiny flat pumpkin cut from paper can sit beside the sculpture as a useful comparison: both suggest the same object, but only one surrounds an empty space. Photograph them from above and from the side to see how viewpoint changes the outline.
Finish display and clean up
Let children choose a display location where the pumpkin will not be squeezed between books or toys. A flat shelf or table is kinder to the curved ribs than a crowded craft box. To store it for another day, set it in a larger open box rather than flattening it, unless you plan to rebuild the joins. Collect the narrow offcuts for small leaves, close the glue stick, and press stray tape onto a scrap before putting it in the bin.