Fall & Halloween
Friendly Haunted Paper House
 Facebook
 Pinterest
 X
X LinkedIn
 Reddit
 WhatsApp
 Telegram
 Bluesky
 Email
Email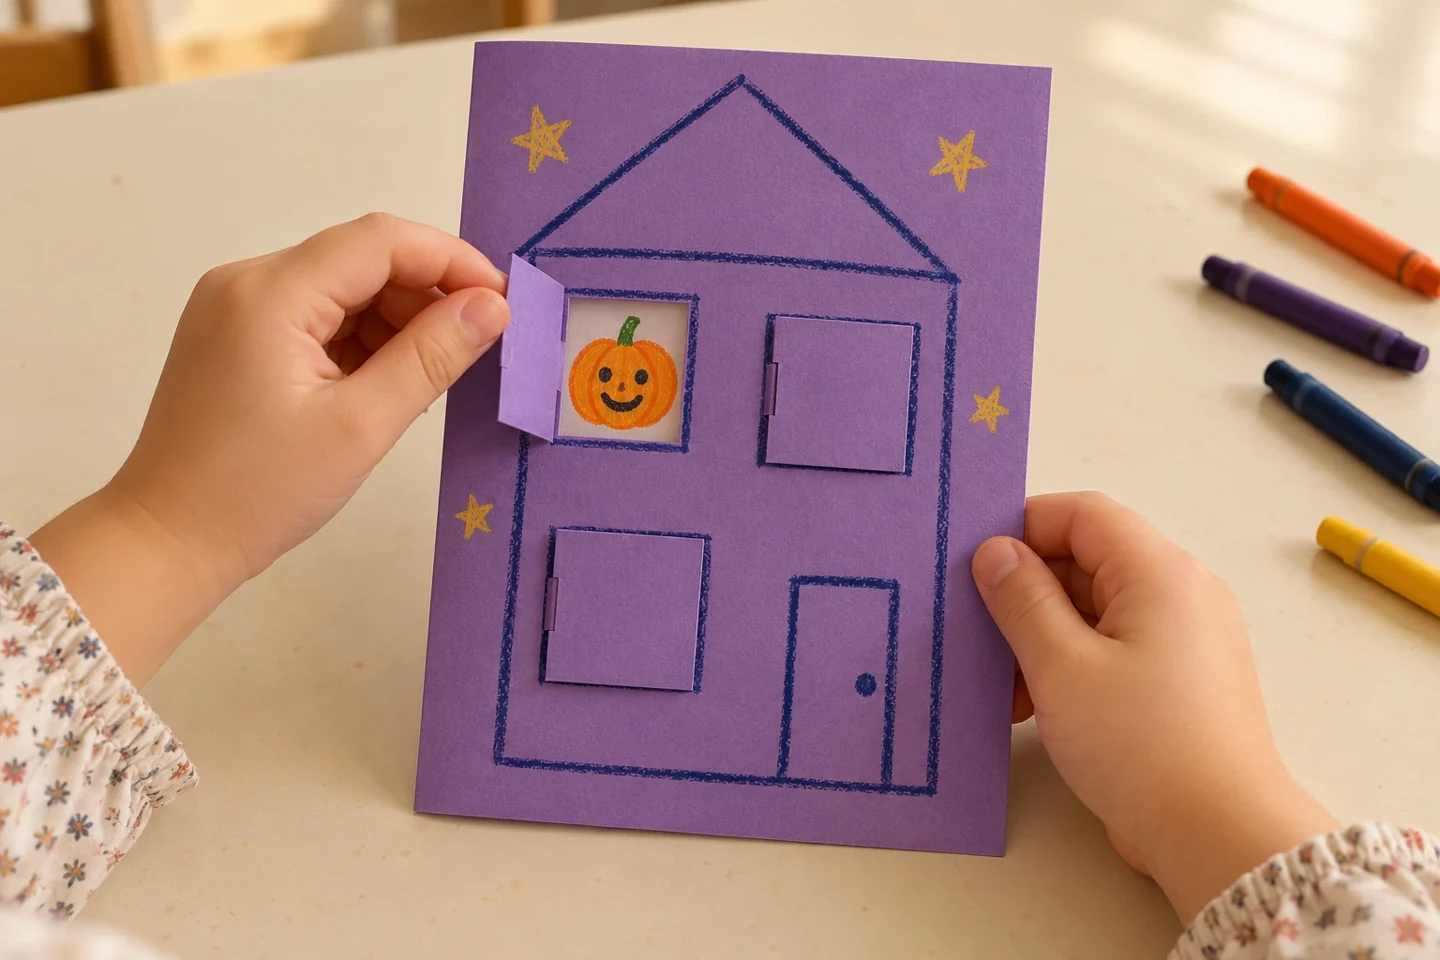
Your activity at a glance
| Suggested ages | 5–10 |
|---|---|
| Activity time | 35 minutes |
What you need
- One letter-size sheet of cardstock, folded in half
- colored paper scraps
- crayons
- glue stick
- adult scissors
- pencil
- ruler
- One spare sheet under the open card while drawing
- A short tape strip for an optional hinge repair
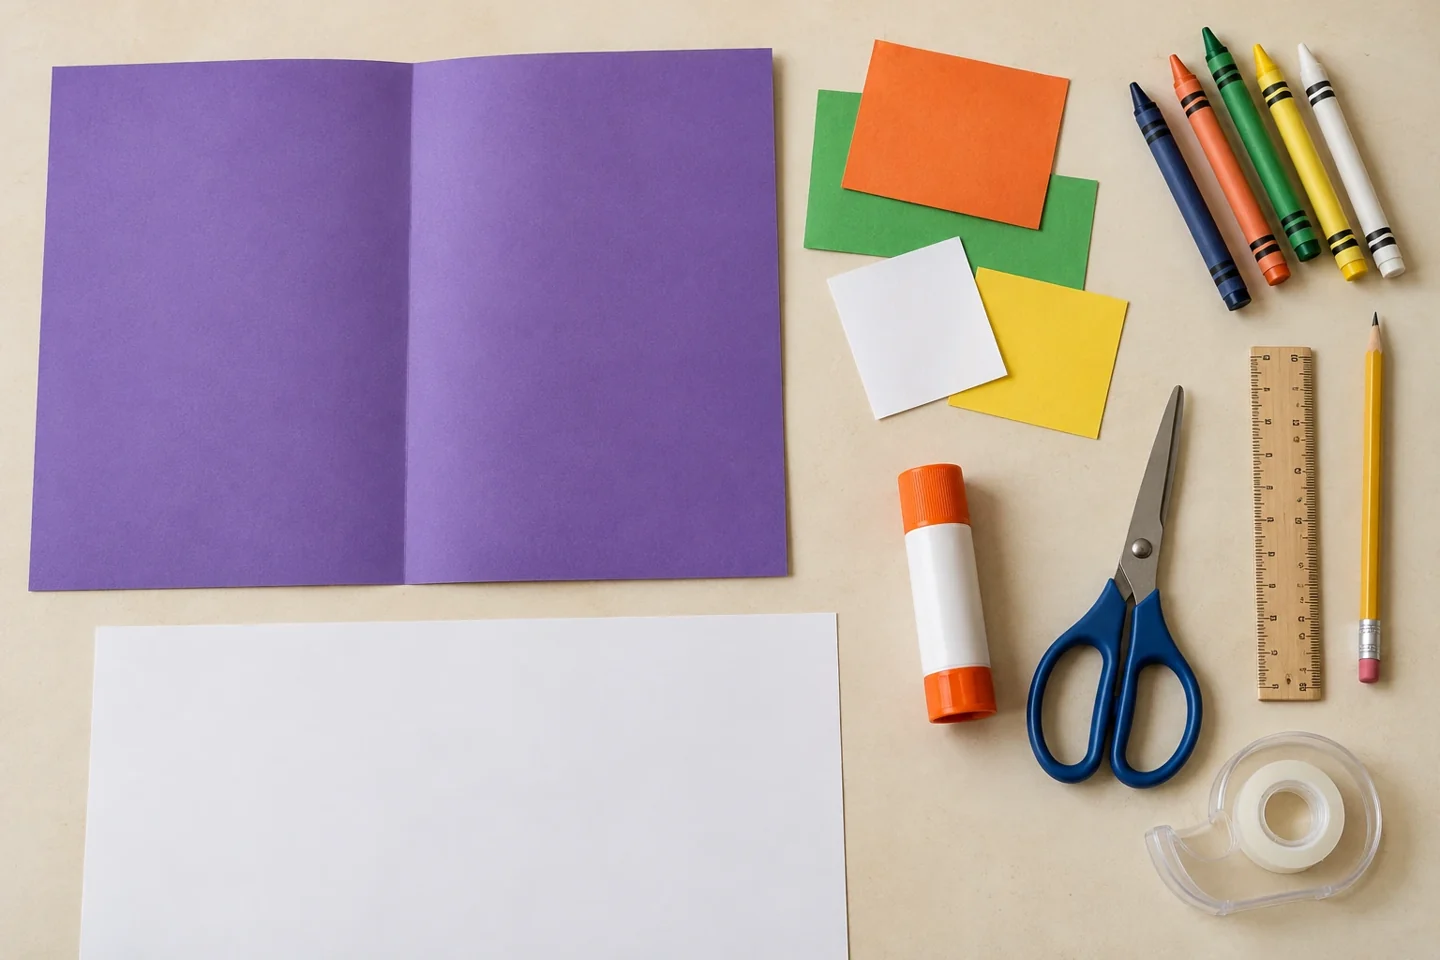
A little project with plenty to discover
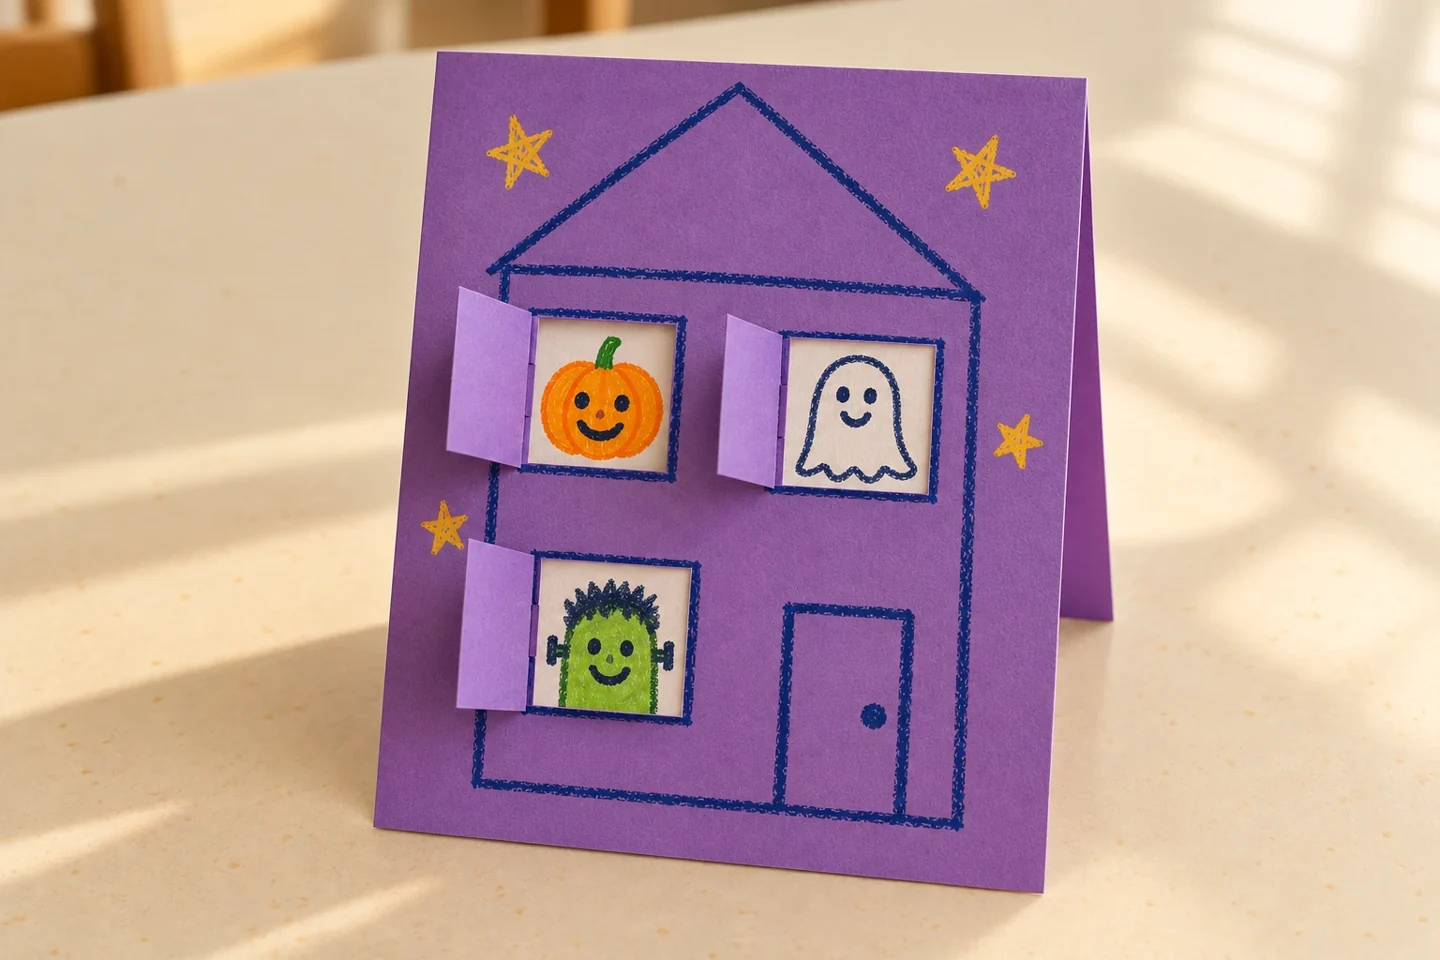
Behind each opening window is a friendly surprise: a dancing pumpkin, a sleepy ghost, or a waving monster. Children build a house and invent small stories about its residents.
Use a folded card that can open fully. Draw the house front on the outer layer and keep all windows at least 2 cm apart so their hinges remain strong. Three windows are plenty for a first house; extra tiny windows make cutting and picture alignment harder. Adults prepare the cuts with the card open, ensuring the back layer stays untouched. Place scrap paper underneath if drawing marks might transfer to the table.
Get the setup right
Each window is a three-sided cut with one uncut hinge. A left or right hinge opens like a little door; a top hinge opens like a flap. Choose one direction for all three windows to simplify the first project. With the card closed, lightly trace the openings onto the back layer through the window spaces. Those outlines show exactly where the residents must fit. Draw each face inside its space before adding a full background scene.
A landscape letter-size sheet folded left to right gives a sturdy house card about 14 × 22 cm. Use three windows about 3 cm square with at least 2 cm between them. An adult can gently bend the front panel at a penciled window edge to start the cut with scissors, then cut the other two sides; keep the back panel open and away from the blades. Close the card, lift each flap, and trace through the opening onto the back panel before drawing a resident. This keeps the pumpkin, ghost, and monster visible through their own windows.
For bright drawings on dark cardstock, glue a flat piece of white paper onto the inside back panel before tracing. Let the glue dry, then close the card and mark the window spaces on that white backing.
Make it step by step
- Fold cardstock in half like a greeting card. Draw a house on the front with a roof, door, and three generously spaced windows.
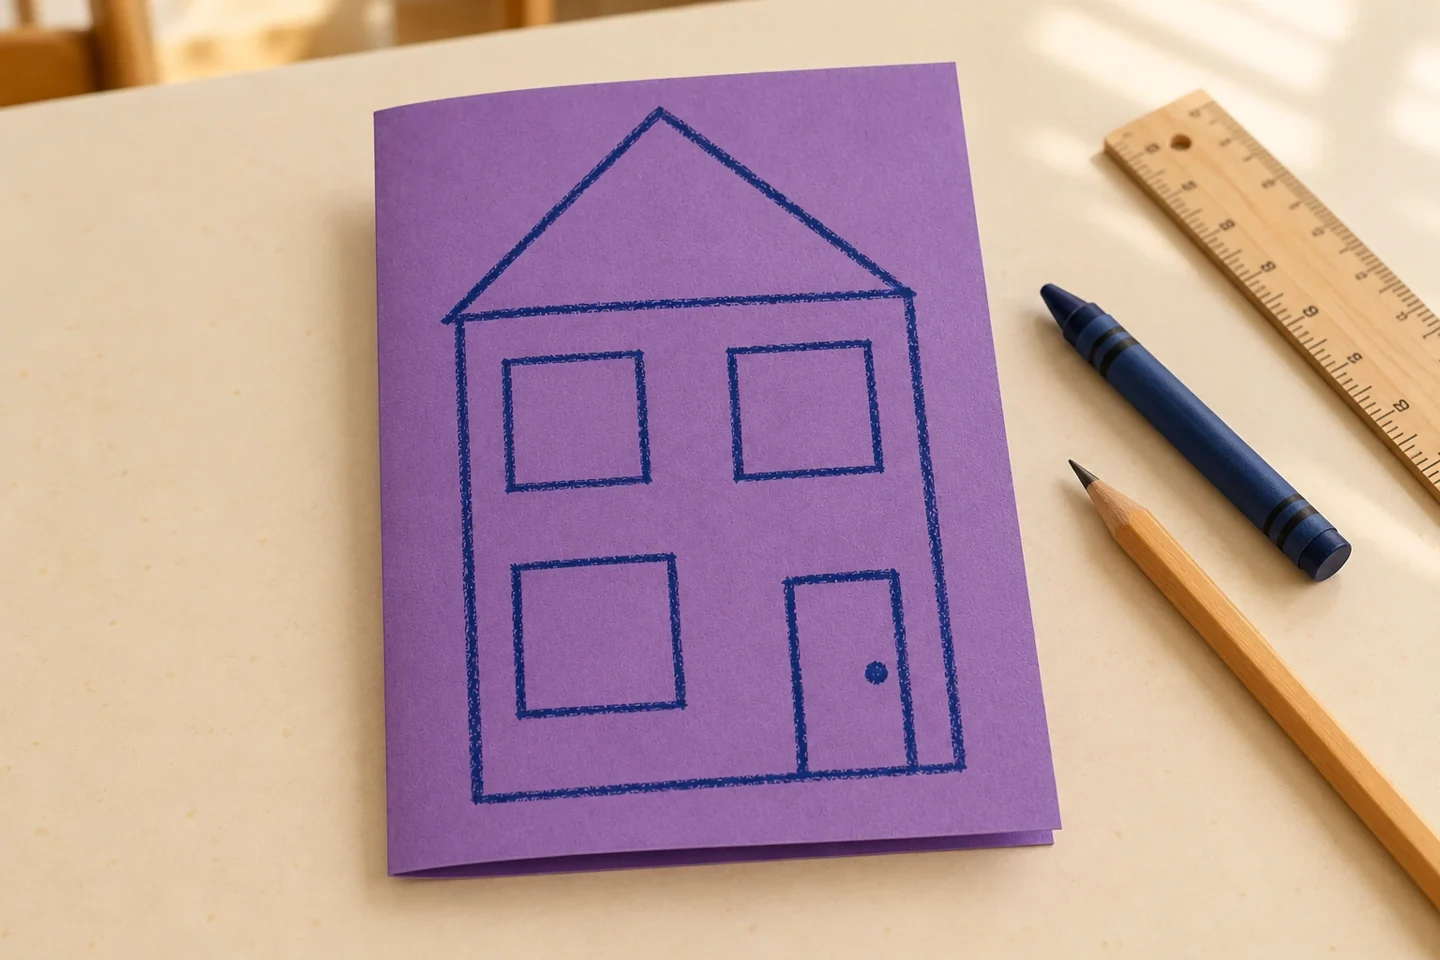
Leave generous space between the windows before an adult makes the three-sided cuts. - An adult cuts three sides of each window through the front layer only. Leave one side attached as a hinge.
- Close the card and open the three flaps. Trace through each opening onto the inside back layer, then open the whole card and draw one character within each marked space.
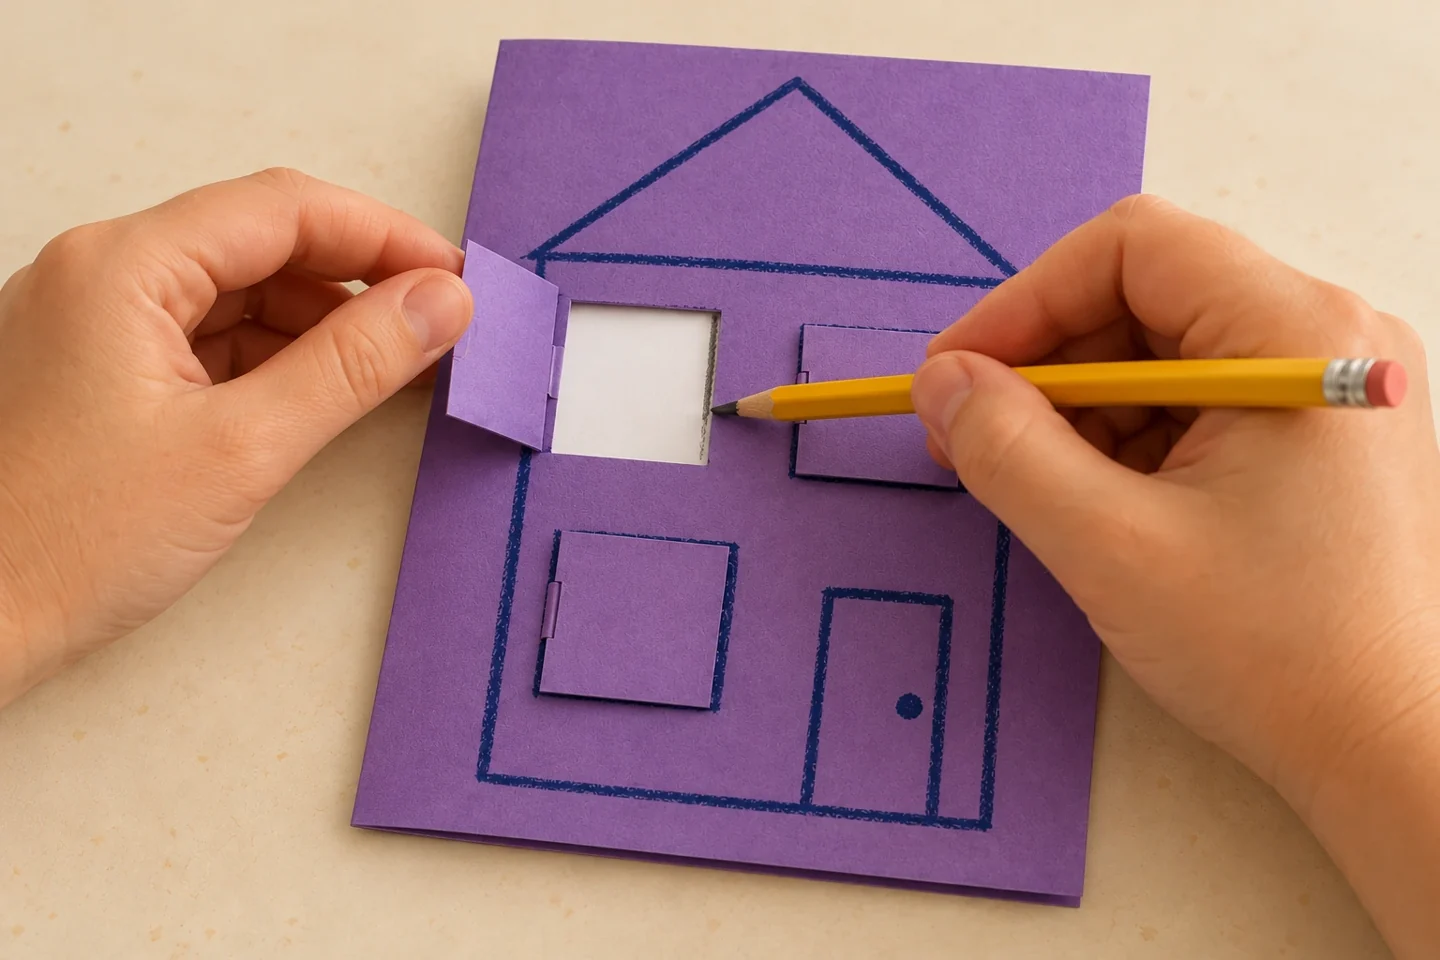
Trace through each opening before drawing the residents so their pictures line up. - Decorate the outside of the house. Keep glue and bulky pieces away from window hinges so the flaps open freely.
- Open one window at a time and introduce its resident. Invite a partner to ask what that character is doing today.
Make it work at home or in your classroom
For younger children, prepare the windows and let them choose characters or dictate their stories. Offer large paper character pieces that can be moved into place before gluing. In a classroom, keep the adult cutting job outside the decorating station and collect cards one at a time for tracing. Older makers can add a fourth window with a different hinge direction or write a short greeting inside each flap. Keep the house friendly by following the child’s preferred expressions and colors.
Talk, notice, and learn together
Who lives behind this window? How might two neighbors help each other?
Open one window and ask what its resident is doing. A sleepy ghost might be reading, while a pumpkin next door is painting. Close the windows and invite another person to remember who lives where. Children can make a short neighborhood story with a beginning, a problem, and a solution, using the flaps to reveal scenes in order. If they prefer drawing to talking, add a small object beside each character that suggests an activity.
Helpful fixes
A picture misses its window: trace the opening gently onto the back layer first. A hinge tears: repair from behind with a narrow tape strip.
Turn your house into a guessing game
Turn the house into a gentle guessing game. One person chooses a resident and gives clues about its color, activity, or window location. The other person opens a window to check the guess. Use position words naturally: above the door, beside the roof edge, or on the left. For a younger child, offer only two possible windows. Older children can write a one-sentence clue on a separate card and exchange clue sets with a partner. Avoid attaching clues directly over the windows, where they would hide the opening. The finished house can then be used repeatedly without needing new construction each time.
Finish display and clean up
Allow any glued residents to dry with the card open so the front does not stick to the back. Test each window gently and trim a decoration if it catches on the flap. Repair a weak hinge from inside with a narrow tape strip, leaving enough flexibility to open it. Store the house closed in a folder once dry. Save large colored scraps for another resident, and recycle very small offcuts rather than leaving them scattered around the work area.