Christmas
Make a Paper Nativity Scene
 Facebook
 Pinterest
 X
X LinkedIn
 Reddit
 WhatsApp
 Telegram
 Bluesky
 Email
Email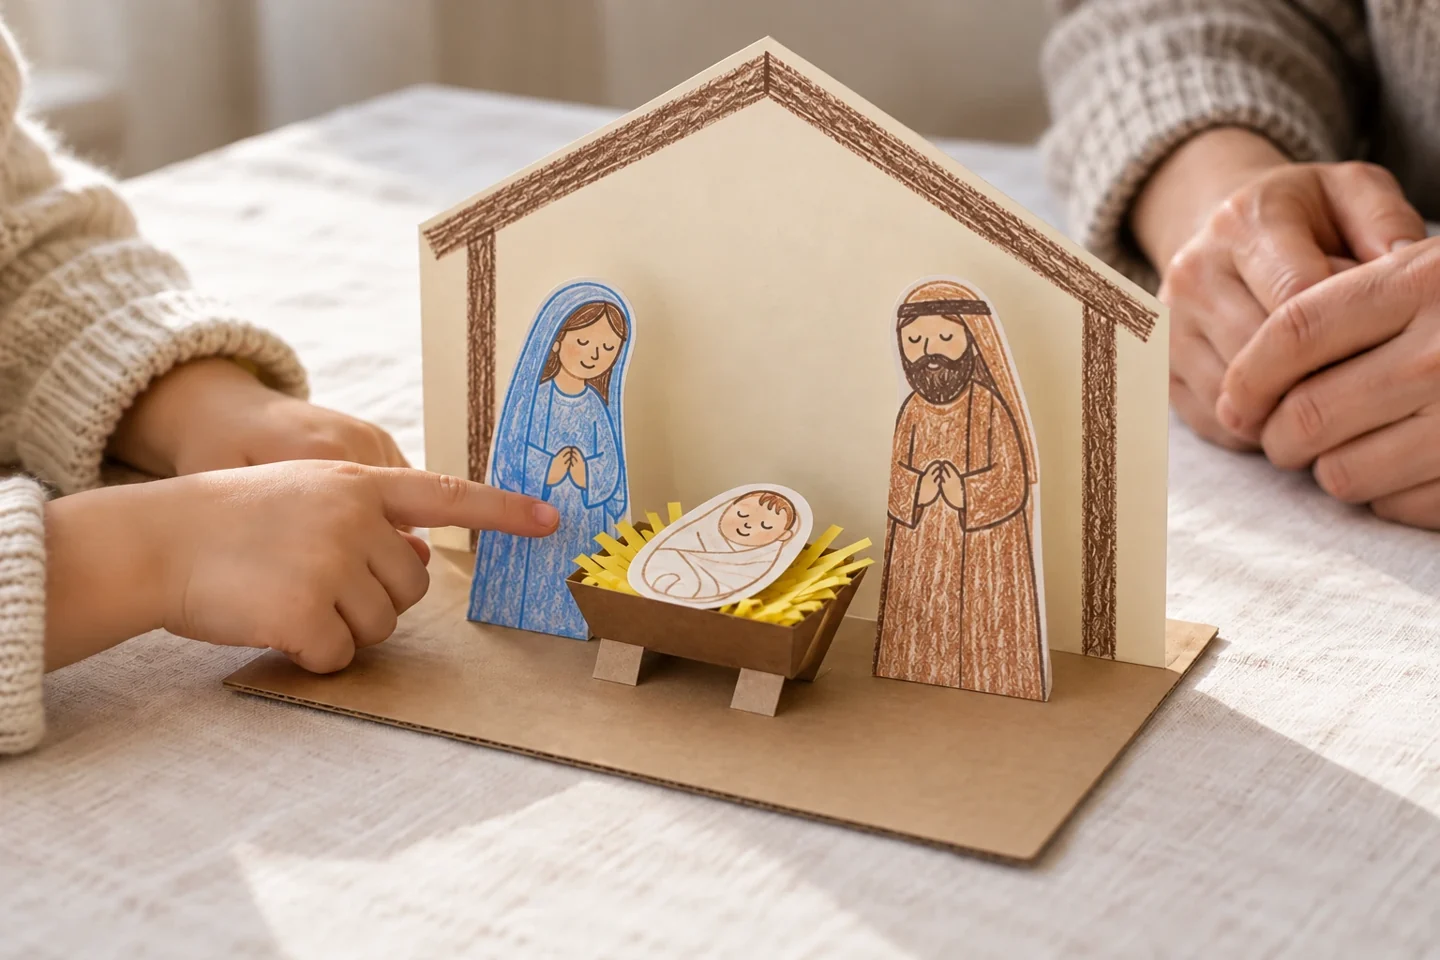
Your activity at a glance
| Suggested ages | 5–10 |
|---|---|
| Activity time | 40–55 minutes |
What you need
- 1 cardstock sheet for the backdrop
- 2 cardstock rectangles approximately 3 × 5 inches for Mary and Joseph, plus 1 rectangle approximately 2 × 4 inches for the manger
- Paper scraps for baby Jesus, paper hay and 2 folded manger support feet
- Crayons, glue stick, scissors, and tape
- 1 flat cardboard base approximately 8 × 10 inches
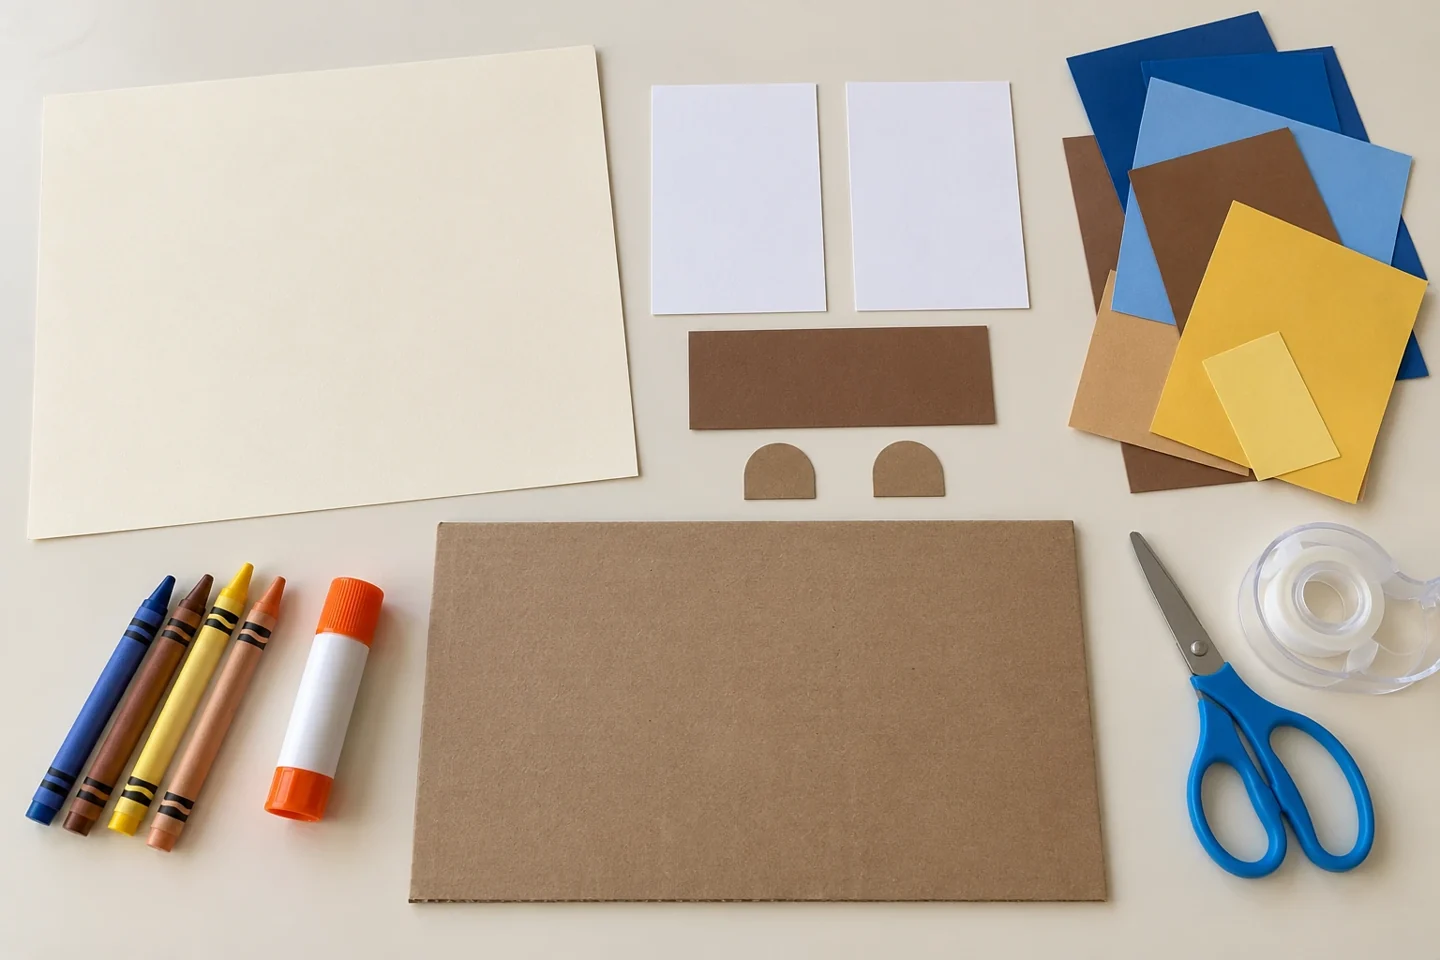
Fold paper supports for a storytelling scene
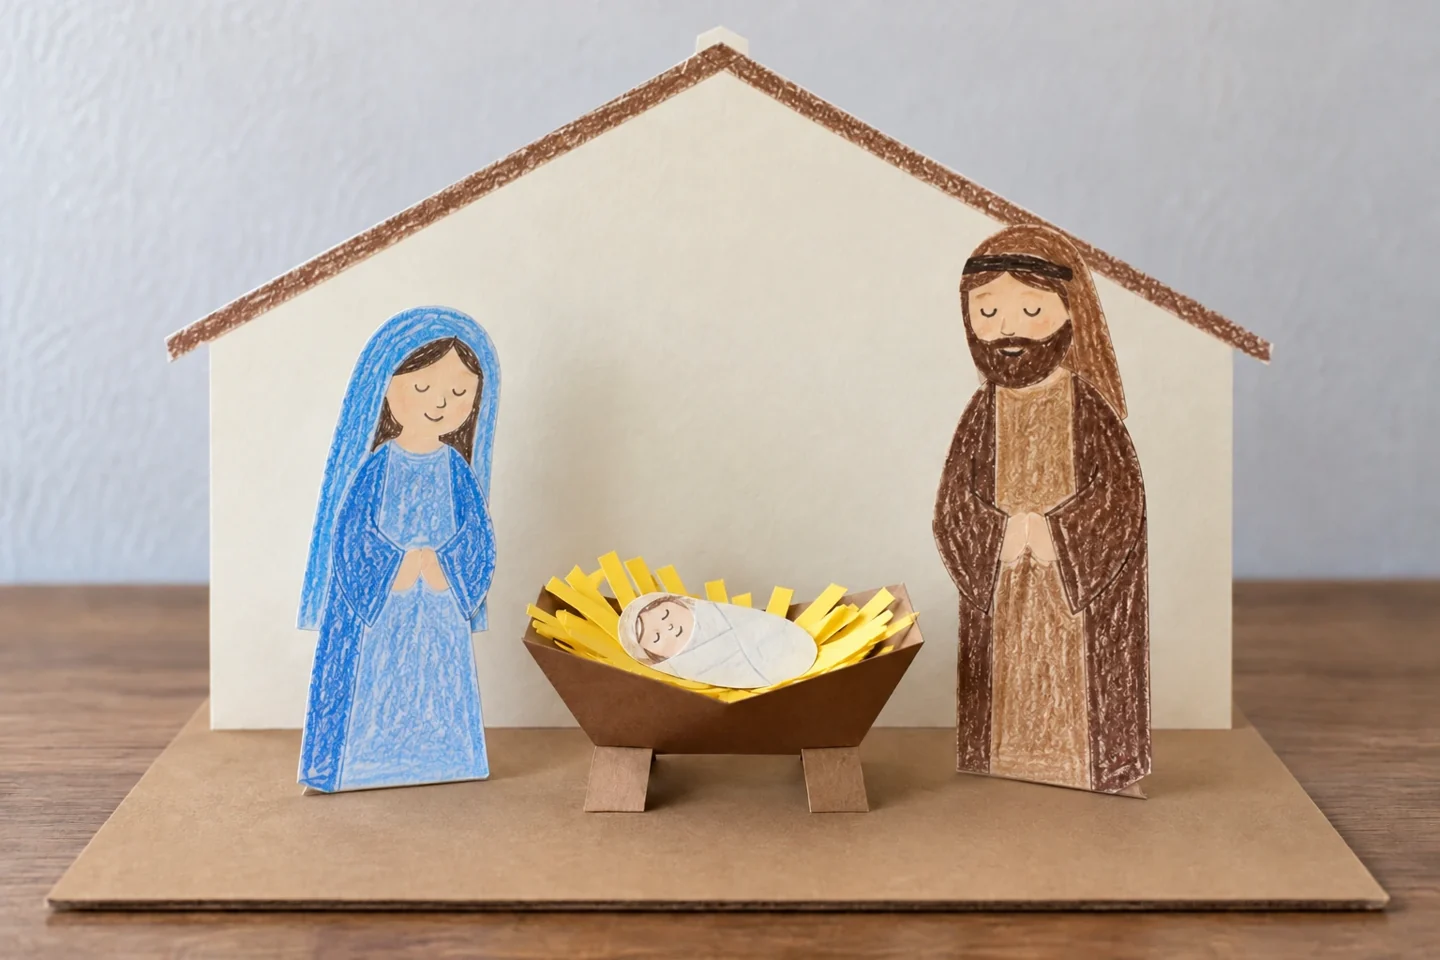
This Christian Christmas craft creates a small standing scene with Mary, Joseph, and baby Jesus in a manger. Children draw simple figures, fold standing tabs, and arrange the scene in front of a paper shelter. Read or retell the birth account in Luke 2 together before making it. The project provides a gentle way to talk about the Christmas story while giving children a construction task they can actually manage.
Before you begin
Read the relevant part of Luke 2 before opening the craft supplies. This scene needs two standing figure cards, one manger piece and a separate backdrop. Children can choose robe colors and draw faces in their own style. An adult can prepare the bottom folds while leaving the character drawings and arrangement to the child.
Let’s make it, step by step
1. Choose the story details
Explain that the scene represents the Christian account of Jesus’ birth. Luke 2 describes Mary, Joseph, the baby, and a manger; shepherds visit later in that chapter. A drawn shelter is our craft backdrop, not a claim that the passage describes its exact architecture.
2. Make the backdrop
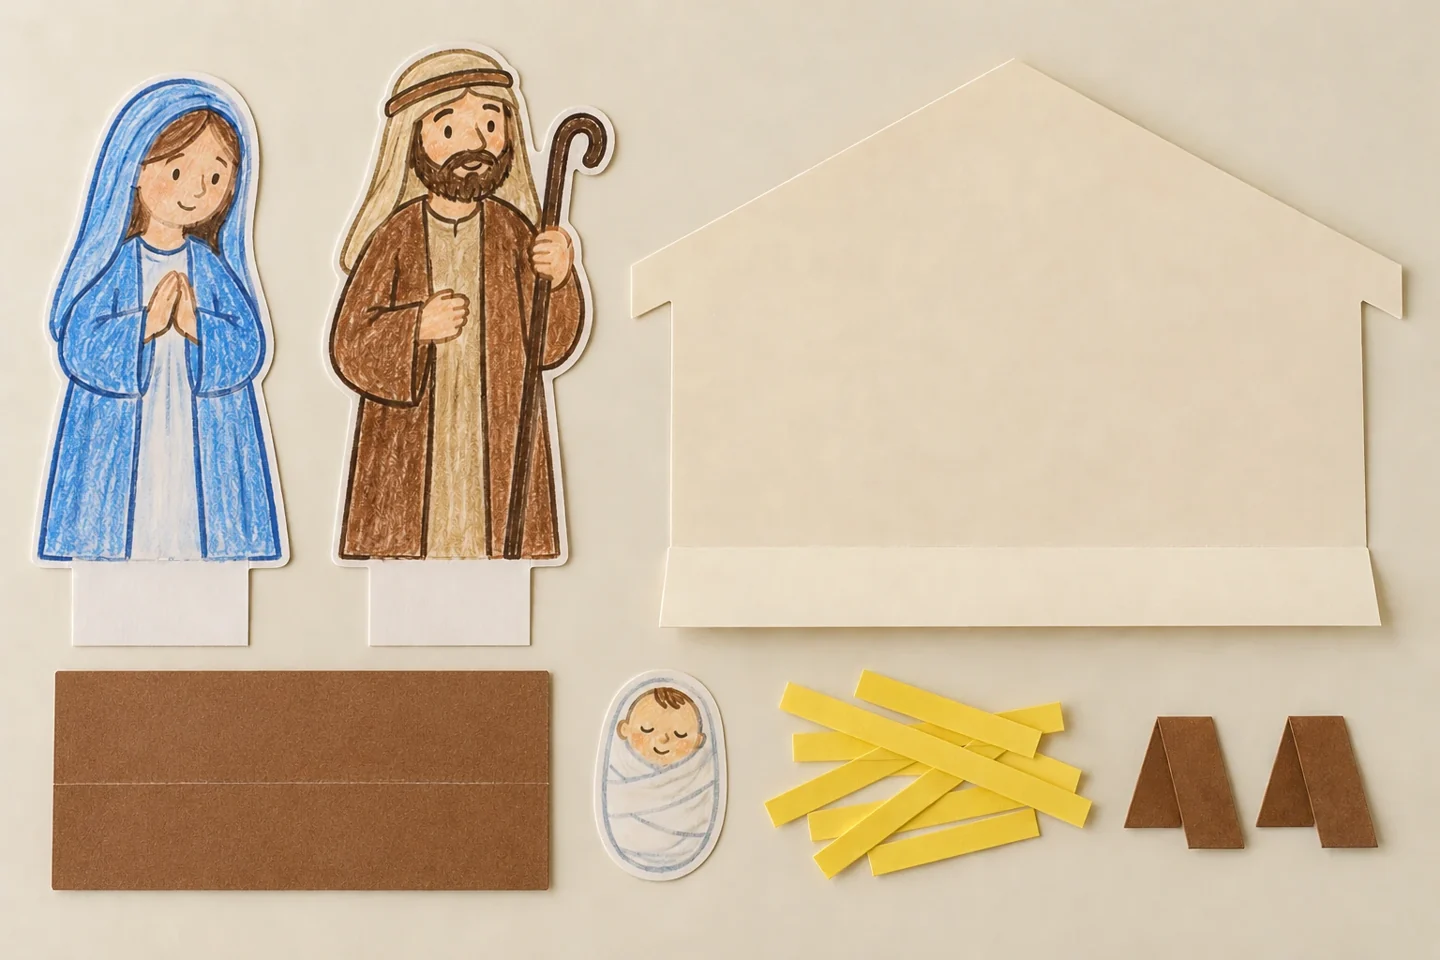
Fold the bottom inch of a cardstock sheet backward to form a support foot. Draw a simple roof outline on the upright section and cut only the upper silhouette. Tape the foot onto the cardboard base so the backdrop stands without needing to balance on a thin edge.
3. Draw Mary and Joseph
Use two small cardstock rectangles to draw simple standing figures. Leave a ½-inch strip blank along the bottom of each. Children can choose robe colors and expressions. Keep the body shapes broad enough to cut without fragile fingers or tiny projecting details.
4. Cut and fold the figures
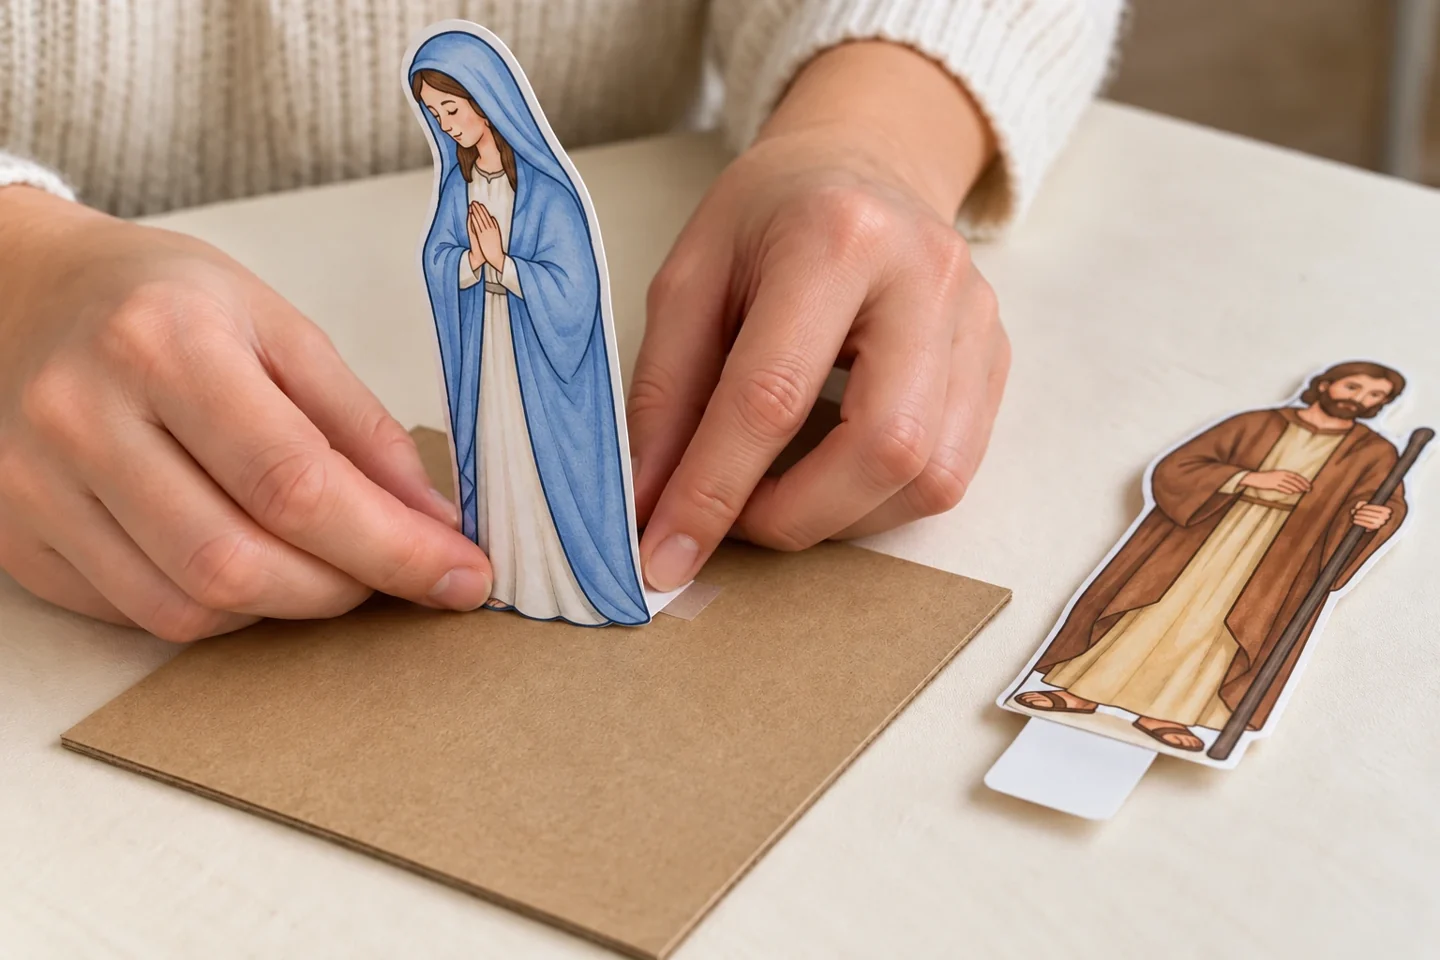
Cut around the upper figure shapes while keeping their bottom strips attached. Fold each strip backward into a standing tab. Place the figures upright and test them on the base. A short tape loop beneath the foot can help a figure remain in position.
5. Make the manger
Fold a 2 × 4-inch cardstock rectangle in half along its length to create a shallow V. Glue two small folded tabs underneath as feet. Add narrow paper strips for hay and a small oval drawing of the baby wrapped in cloth.
6. Arrange the scene
Set the manger in front of the backdrop with Mary and Joseph nearby. Move each piece until the arrangement is easy to see. Attach the standing tabs only after the child has chosen their positions. There should be room to reach and point to each figure.
7. Add optional visitors
Children who want to continue can draw shepherds with the same standing-tab method. Wise visitors belong to the separate account in Matthew 2; if you add them, explain that familiar Nativity displays often combine story moments rather than showing a single instant.
8. Retell and display
Invite the child to describe who is in the scene and what the manger represents. An adult can write the child’s explanation on the back. Put the scene on a shelf where its folded supports can stay open, away from real candles. The small figures can also return to the table for another storytelling session.
Talk, notice, and learn together
Ask how folding a tab changes a flat drawing into a standing figure. Compare a narrow support with a wider one. For story conversation, use open prompts such as “Who have you placed beside the baby?” or “Which part would you like to tell?” rather than expecting a memorized retelling.
Make it work at home or in a classroom
Younger children can color adult-prepared figures and help arrange them. Older children can create additional standing animals or a background drawing, making clear which details are their artistic choices. In a church or classroom setting where this Christian activity is appropriate, keep the story explanation short and give each child space to interpret the figures.
Helpful fixes and cleanup
If a figure tips, lengthen its support foot with a taped strip. If the manger flattens, use firmer cardstock and crease its center again. Store the pieces in a shallow box; figures can be lifted from removable tape and packed flat after the display period.
Keep the story and the artwork connected
Luke 2 gives the story details for this scene. Robe colors, expressions and the drawn shelter are choices children make for their artwork. If you add the wise visitors from Matthew 2, explain that the display brings together moments from two accounts.
A useful way to extend the activity
A child who wants more drawing space can make a wide background scene behind the standing figures. Keep the movable figures in front so the difference between backdrop and character remains visible. When discussing the story, distinguish what the text says from what the child has imagined, such as robe colors or the appearance of a shelter. Both can belong in artwork when explained clearly.